scones, Signature Bake

Signature Bake: Mary Berry Cherry Cake Scones

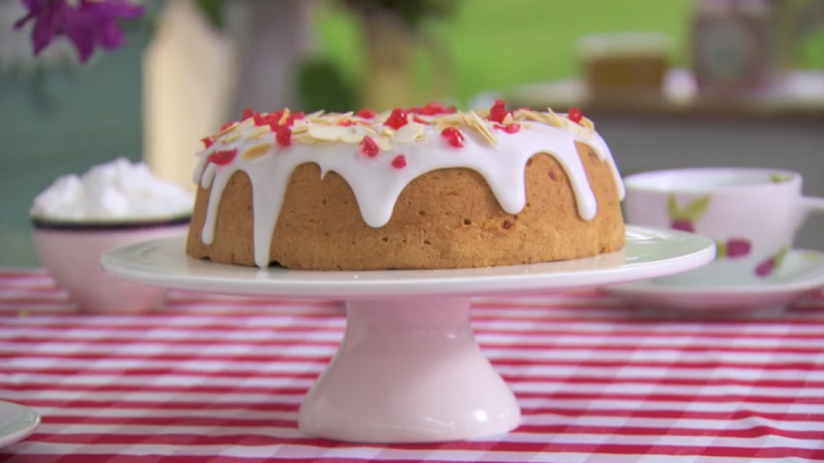
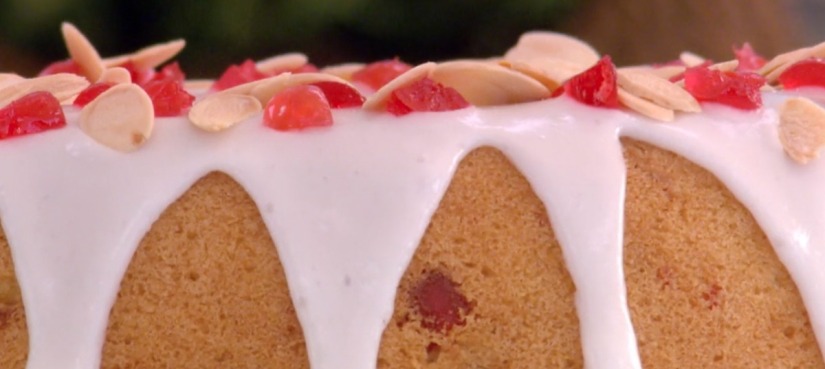
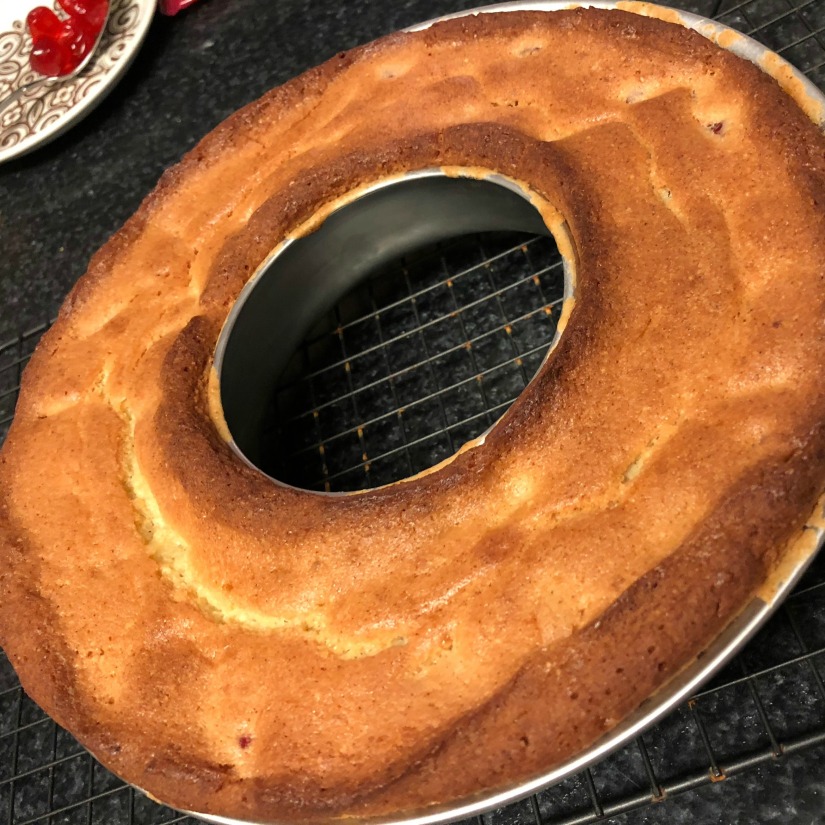
After I tackled my first Great British Bake Off Technical Challenge, Mary Berry’s Cherry Cake, I was totally chuffed and left with a half a tub of leftover glacé cherries. Generally, when I have left over ingredients that I don’t use on a regular basis, I just leave them to commune with my ever-graying dried herbs and spices until I move or there is some kind of fire. But I imagine that these cherries would harden into ruby red stones, and who needs Thanos knocking around their cupboard trying to complete his gauntlet (#InfinityWar, anyone?)? Glacé cherries are yummy, so I briefly considered just eating them whole, but I did not want to discover what these syrupy sweet wax-adjacent fruits would do to my system. The only other choice was to use them. How? Bake them into scones!

I’ve been on a serious scone baking kick for a few weeks now and I find they are such a fun bake. You get the satisfaction of bringing dough together with your hands and shaping it without the challenge of arduous kneading or the patience of proving. My husband, who was raised by a proper English lady, and my father-in-law, who is the spouse of that proper English lady, love to remind me that what I make are not “proper English scones.” Proper English scones are plain, fluffy white biscuits to be eaten with jam and Devonshire cream. They are not to have any added flavor or fruit, except for maaaaaybe currents. My mother-in-law, who is that proper English lady, only says kind things about my scones, because actual British people are nice. (I’ve had her scones with jam and Devonshire cream, and they are amazing.)

BDB Proper English Scone
Proper English Scone, made by my Mother-In-Law, a proper English lady.

I was inspired to make my own scones by what may be the antithesis of the “proper English scone,” the Starbuck Scone. Like everyone in America, Brad and I live right across the street from a Starbucks, and down the street from a Starbucks, and caddy corner from a Starbucks. We had gotten in the habit of getting Starbucks scones nearly every morning. Brad would go for the cranberry orange scone, which is life-raft like in size and flavor profile, and I would go for the petit vanilla bean because who would not want a sponge if it is 120 calories and covered in icing sugar? They were convenient, carb-y and I had not yet discovered how delicious the homemade scone could be.

When it finally dawned on me that we could save a few bucks if I just took an afternoon to knock out a batch of scones, I started scrounging the internet for a recipe that seemed easy enough, didn’t have too many ingredients, and did not have enough sugar to qualify as a triangular cake, and I came upon this recipe on Epicurious from Bon Appetit, November 1998. It’s 4 out of 4 tiny red forks and a 96% “Make it Again” rating, and the tiny red forks do not lie – it’s a solid recipe. The first time I made this recipe, I made it pretty much as written except I subbed whipping cream and apple cider vinegar for the buttermilk and made the scones smaller so I got 16 out of the recipe instead of eight gargantuan ones. They turned out great, perfect for dipping in tea or coffee and they actually tasted way better than the Starbucks cranberry orange pontoon. I’ve since made the recipe in a couple of different variations including lemon, orange marmalade thumbprint, blueberry lemon thumbprint, and now these – my Mary Berry Cherry Cake Scones.

BDB Orange Marmalade Thumbprint Scones
Some of my orange marmalade thumbprint scones. I wouldn’t kick those out of bed.

 On Your Mark, Get Set, Bake!

BDB Sue Baaaaake

 Rooty tooty, prep your fruity. I prepped the cherries exactly as I did in for the cherry cake – by cutting them into quarters, rinsing off the syrup, drying in a kitchen towel, and borrowing a tablespoon of my flour and coating them. This time I actually did a double rinse – rinsing them before and after the quartering, and that did make the cherries less sticky to handle while cutting. Then I zested and juiced my lemons. I like zesting my citrus on the large side of my box grater instead of using the small side of the grater or a microplane for my scones. I know what you’re thinking – I’m a maverick! But I like finding the waxy pieces of citrusy zest in my scone. It adds to the texture, I think.

Sorry, buttermilk. After juicing, I took a tablespoon of my lemon juice and put it in the bottom of my liquid measuring cup and filled the rest with whipping cream up to one cup. Don’t stir it! Then the cream just thickens like sour cream and it’s harder to work with. I always sub out buttermilk for whipping cream plus an acid because, frankly, I find buttermilk kinda gross and not the kind of leftover ingredient I want hanging out in my fridge. It’s sour and weird, and how do you know when it is bad? Whipping cream is a lovely thing to find in your fridge. You have a wonderful excuse to pour whipping cream directly into your tea – decadent, I know, but you got to use up this leftover cream! Or I suppose you could be like The Dude and have a super rich white Russian. No one has ever looked at leftover buttermilk and felt hopeful. I apologize to all of the buttercows – it’s not you, it’s me.

BDB prepped scone ingredients
Ingredients in waiting. A still life. (Um, are all photographs technically still lifes?)

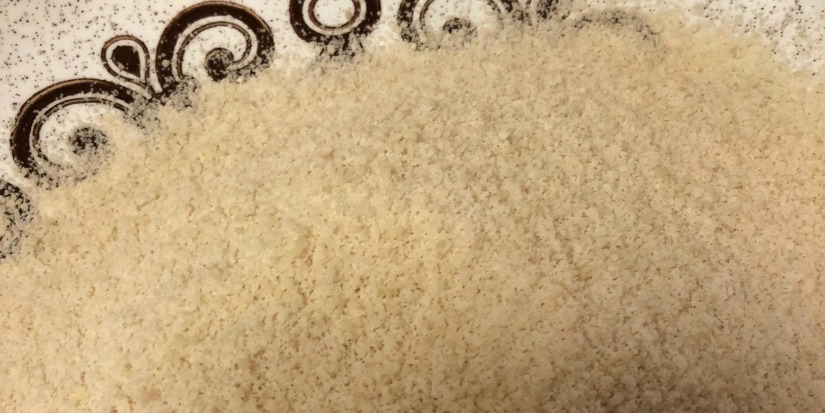
Ground almonds, why not? Along with leftover glacé cherries, I had leftover blanched almond slivers from making the ground almonds for the cake, so I just blitzed enough to make a half-cup of ground almonds, which I swap out for a half a cup of the flour. I sieved the ground almonds through a medium sieve before I sieved them in with the rest of my dry ingredients.

Butterfingers. Incorporating your butter cubes is about the funnest part of this whole recipe. You drop the cold butter cubes into the dry ingredients and then you go in with your pinchy-crab fingers and just pinch and rub the butter into the flour until practically all of your butter is one with the flour and you end up with what looks like bread crumbs or a course meal. I have a pastry cutter, but I find it to be less efficient and satisfying than just getting in there with your hands. I’m like Paul Hollywood in that way, I like to get handsy with my dough. (But I am unlike Paul Hollywood in that I eat my cake with a fork not my hands, because I am a dignified person.) After you get to breadcrumb stage, mix in your prepped cherries.

BDB Scone Crumbs
Dry ingredients and butter, inc.

Mixing and cutting dough. I give my lemon and cream mixture a quick stir before I add it a little bit at a time to the bowl. It’s the reaction of the “buttermilk” and baking powder and soda that gives the scone it’s little bit of rise, like a quick bread. Once all of the liquid is in, give the dough a little bit of a knead so that it comes together into a ball. I just knead it right in the big bowl. Why bother getting my counters dirty? Give the ball a light dusting of flour, then split it in two and give each of the smaller balls a light dusting so that they’re easier to handle. It’s always easier to handle balls after they’ve been powdered.

BDB Loreai Gif

I transfer my powdery balls to a baking sheet that’s been lined with parchment paper and I pat them into round 3/4 inch thick disks. I’ve done it with a rolling pin, but I don’t think it makes that much of a difference. Then I cut each of those disks into eight even pieces, pizza style, and distribute those on your baking sheet so they’re about an inch apart because they will grow in the oven.

BDB Cutting Scones
A picture of my scone dough all cut out and a little bit of my finger in the upper lefthand corner. #blogpro

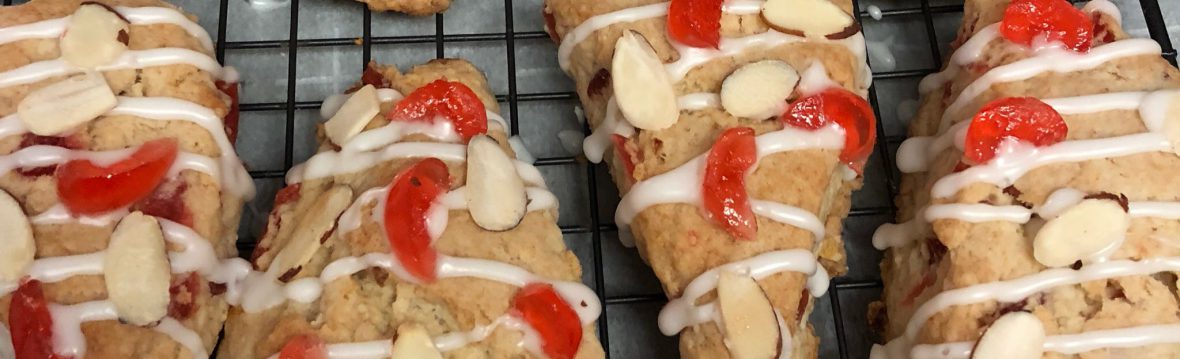
Adorn them golden triangles! While my scones were getting all puffy and golden in the oven, I toasted my almonds and cut my decorative cherries into eighths. When my scones were out, I made the lemon icing. It is the exact same two-ingredient icing as the cherry cake. You just add the lemon juice to the icing sugar a smidge at a time until the icing sugar just lets go of your whisk. You don’t want to add too much liquid, because you want the icing to keep its shape on the scone.

Once the scones have cooled for ten minutes on the baking sheet, I start decorating. I wanted to channel Nancy’s winning cherry cake for my icing job and went for a tight zig-zag. I would ice the scones one at a time and then stick on my cherries and almonds. I found I had to put dots of extra icing to get the cherries and almonds to actually stick, and while they turned out really cute, I got pretty fed up with the fiddlyness of sticking things on individually. When I make these again, I’m totally just going to make twice as much icing and just throw the toppings on. Not as cute, but way quicker, and who doesn’t want more icing?

BDB Nancys Winning Cherry Cake
Nancy’s winning Cherry Cake, which earned a “perfect nuts” from Mary Berry!
BDB Cherry Scones Decorated
How does my ice job look next to Nancy’s? (Be kind!)

The result?! These are my favorite batch of scones yet. The ground almonds add a little more cakeyness to the scone, which makes them perfect for dipping and soaking up your morning tea or coffee. The tartness of the lemon icing and the sweetness of the cherries compliment each other perfectly. And look how darling they are! They are sweet, adorable, and a little bit tart, just like Mary Berry herself!

mary berry smile GIF by BBC-source

Recipe: Mary Berry Cherry Cake Scones

Adapted a recipe from Bon Appetit, November 1998.

BDB Mary Berry Cherry Cake Scone
My scone glamour shot. Work your angles, scones! Get it? Because they’re triangles.

 Ingredients

3/4 cups glacé cherries plus 7 for decoration

1 cup (minus a table spoon) of heavy whipping cream

Juice of 2 lemons

2 1/2 cups of all-purpose flour, plus extra for dusting

1/2 cup ground almonds

1/3 cup sugar

2 1/2 teaspoons baking powder

1 teaspoon salt

1/2 teaspoon baking soda

Zest of two lemons

3/4 cups (1 1/2 sticks) chilled butter

1 1/2 cup icing sugar

3 tablespoons of flaked almonds

Directions

  1. Preheat and prepare the pan. Preheat your oven to 400° F and line your sheet pan with parchment paper.
  2. Prepare the cherries and cream. Quarter then rinse your 3/4 cups of cherries, then borrow a tablespoon from your flour to coat. Put a tablespoon of lemon juice in the bottom of your liquid measuring cup then fill to one cup with cream. Don’t stir.
  3. Mix dry ingredients. In a big bowl, sift your flour, ground almonds, sugar, baking powder, salt, and baking soda. Then add your zest.
  4. Incorporate your butter and add cherries. Cut your butter into cubes and drop the cubes into your dry ingredients. With your fingertips, rub the butter into the dry ingredients until it looks bread crumby, then mix in the cherries.
  5. Add liquid and make the dough. Give your lemon juice and cream a quick stir, then add it a little bit at a time to your bowl, tossing the contents around with a fork. Once all of the liquid is in, knead the mixture together just until you can make it into a ball.
  6. Divide the dough into triangles. Cut the dough in half and cover each half lightly with flour. Make each half into a 3/4 inch thick disk on your sheet pan. Cut each disk across the diameter into eight triangles. Arrange the triangles into the sheet pan so they have some room between them on the sheet pan.
  7. Bake and toast your almonds. Place the sheet pan in the center oven and bake for about 17 minutes until your scones are a pale golden brown. While your scones are baking, toast your almonds in a dry pan on medium heat. Set aside to cool.
  8. Cool and get cherries ready to decorate. Once your scones are done, let them cool on the pan for 10 minutes, then move them to a cooling rack. While your scones are cooling, slice remaining cherries into eighths.
  9. Make icing. Put your icing sugar into a medium bowl. Whisk in your lemon juice tablespoon at a time until it makes an icing just thick enough drizzle.
  10. Decorate! Ice your scones, then top with almonds and cherry eighths.
Cake, Technical Bake

Technical Bake: Mary Berry’s Cherry Cake

It’s Time to Get Technical!

Merry Berry's Cherry Cake
I can sure take a screen cap, can’t I? From the Masterclass Episode.

I used to consider myself a fairly proficient home baker. My favorite part of getting a party invitation has always been considering what kind of delectable baked treat I can make to impress my friends and distract them from how socially awkward I am. But I’ve always relegated myself to drop cookies or cupcakes, putting more thought into marginally inventive flavor combinations rather than fiddly decorations. I also have generally stuck to recipes that use all-purpose flour, because I feared having barely used sacks of aging flour just hanging out getting stale and taking up cupboard space. I’ve never done pastry, I’ve never done a yeasted bread, and I was content with that. And then I watched The Great British Bake Off.

Since the The Great British Bake Off bubbled up on my Netflix homescreen, under the American title of The Great British Baking Show, I’ve watched and re-watched the four available seasons much to the frustration of the Netflix algorithm, I’m sure. (“Again, Lisa? But I make such brilliant suggestions!”) Watching these “home bakers” produce an insane variety of impressive bakes under such tremendous pressure blew my mind. I was suddenly motivated to whack something in the oven, slap some gluten into dough, and hold a meringue over my head!

But one doesn’t simply knock out a brilliant showstopper like Christine’s shortbread Bavarian Clock Tower or Nadiya’s chocolate peacock after making only drop cookies and cupcakes. I need to diversify my baking skills and work myself up to Star Baker of my own kitchen. That’s how I got the idea of working my way through the GBBO Technical Bakes one by one, starting with Mary Berry’s Cherry Cake.

Why this cake to pop my technical bake cherry? (Ooh! Sue would be chuffed with that one!) Because it is the first technical bake for Nancy, Richard, Martha, Chetna and the other bakers in Episode 1 of Series 5, which for those of us across the pond is Season 1. My parameters on myself will be very different than those competitors, in that I’m giving myself literally every advantage. First and foremost, I’m going to have the complete recipe. I’m aspiring to making something worthy of the Gingham Altar of The Great British Bake Off, not Netflix’s American baking competition show Nailed It! (As much as I love comedian/host Nicole Byer, I’m morally opposed to that show on so many levels.) I’m also going to aspire to keep to the time and I’ll report honestly if I made the bake in time or not, but I’m going to keep baking the damn thing until it’s edible. I’m not in this to create food waste, though I know I’ll probably end up rage-binning a fail or two. (Like Iain’s Baked Alaska! Heartbreak!) I’m also going to re-watch the eps and take copious notes so hopefully I can avoid the pitfalls stumbled upon by the contestants who did these challenges in earnest.

The Brief: Mary Berry’s Cherry Cake

bdb topographical cherry cake
Sexy topographical cake shot from the Masterclass episode.

Our queen, Mary Berry, chose this particular cake over all other for the kick-off of season five, “It’s a great British classic, but it’s quite tricky to get right.” It all comes down to the jewels of that baked golden crown, the cherries. They have to be perfectly suspended in the cake and not all gathered at the bottom or off in one spot. Then there is is the lemon icing that needs to be the correct consistency so that it can create gentle drizzles down the side of the light golden brown cake. The bakers have 2 hours. I’ll give myself 2 hours and 11 minutes to make up for my slow, conventional oven, which I’ll get into later.

I pulled the recipe from the Great British Bake Off: Masterclass Series 1: Episode 1 in which Ms. Berry herself walked her humble viewers through this recipe.

Shopping List

Most of the tools and ingredients I either had or could get from my regular grocery store. There were a few items, however, that I had to order online or, in the case of ground almonds, improvise at the last moment.

  • The Food Scale. British recipes call for their dry ingredients to be weighed rather than using graduated cups and spoons. I poked through amazon reviews before landing on this one – the Etekcity Digital Touch Kitchen Scale.
  • The Ring Mold. Mary called for a 23 cm ring mold. I did not want to settle for a bundt pan because I liked the aesthetic of the smooth ring of cake. I ended up getting a 9.75” savarin mold.
  • The Glacé Cherries. I wasn’t sure if a grocery store would carry these on the regular, so I just bought these from amazon.
  • Caster sugar. American grocery stores carry hardly anything beside granulated and powdered white sugar. Caster sugar is a finer sugar without going full powder. I bought this on amazon, though my British friend told me later that she often buys super fine Domino’s sugar for her British baking, which is kept by the coffee and tea.
  • Ground Almonds. For some reason, I thought I would be able to find ground almonds in a sack in the baking aisle of the grocery store. Silly me! I went to three different grocery stores, and while I found almond flour and almonds in all forms, but no ground almonds. I ended up buying blanched silvered almonds and then grinding them in my magic bullet. I ran them through a medium sieve to get the big almond chunks out.
BDB ground almonds
My beautifully ground almonds! Like a sandy beach of yummy ingredientness.

On Your Mark, Get Set… Bake!

BDB Bake

WTFan??!! Watching the show, they would declare oven temp using the term “fan.” And I’m all like, what the F is fan? Some quick googling around revealed that “Fan” refers to turning the fan on in your fancy-pants convection oven. Well, my pants are quite ordinary and the air in my oven is still as a tomb, so what’s an amateur baker to do? The answer is math. Let me get my pencil from behind my ear… oh wait, I’m not Richard!

It turns out that a Fan-assisted, or convection, oven lowers your oven temperature by 25° and decreases your cooking time by a third. There are LOTS of sites that help you convert recipes for a conventional oven into a recipe for a convection oven but us standard oven plebes are on our own. Mary Berry called for “160 Fan” for her Cherry Cake. I converted it from Celsius to Fahrenheit by asking Siri which comes to 320°. I then added the 25° to make up for my lack of Fan. So my bake temp was going to be 345° F. Mary said the bake time was to be around 35 minutes, so I increased the bake time by 33% and got 46 minutes. Boom. Simple! It didn’t take an aerospace engineer after all.

BDB Andrew

Prepare the Cherries. Our fine bakers in the tent were a bit baffled by how, exactly, to prepare the cherries, which was the crux of the entire bake. “Does she mean wash or does she mean cut? Well, I’m going for cut,” Jordan decided. Well, cut he did, chopping those poor cherries into oblivion so that they seemed to dissolve into his cake. Poor Claire and Richard left their cherries far too large so they all sunk to the bottom of the tin.

In the Masterclass episode Mary, revealed the secret of her suspended cherries, which is fourfold – cut, wash, dry, and coat. Paul Hollywood was aghast when Mary instructed him to quarter the 200 grams of sticky cherries, but I rather enjoyed the task. I would just line my little cherries up three like soldiers, then cut them in half, then line up the six halves and cut them again. Only after cutting them did I wash the syrup off, because Mary was very clear that if I washed before I cut the syrup released from the center of the fruit during cutting would be my undoing. After I rinsed them and dried them with a kitchen towel, I borrowed a tablespoon from my 225 g of self-rising flour to coat the cherries.

BDB Prepared Cherries
These cherries are as prepared as they’ll ever be!

All-In-One Method. It doesn’t get much easier than dumping all of the ingredients into a bowl and mixing them together. Mary used a stand mixer in her masterclass, but I don’t have a stand mixer. The fancy Kitchenaid stand mixers are prohibitively expensive and take up valuable kitchen space, but deep down in my little bake-loving heart, I desperately want one. I’m sure I’ll find an excuse in later bakes to take the plunge, but for this bake Norman and Nancy both mixed by hand. Norman’s cake was a little dry, but Nancy’s cake was the winner (Surprise, surprise!) so I figured that how the ingredients came together wasn’t all that important. I just used my hand mixer until the ingredients just came together and then folded in the cherries.

In the lap of the Gods! Once I had all of the batter in the mold and leveled, I whacked my cake in the oven to bake. I tried to clean up my baking mess while I waited, but I couldn’t help but look through the window of my oven every few minutes to see how my little, sweet cherry baby was doing. About ten minutes into the bake, I saw that my cake had risen about an inch above the tin. Catastrophe! My savarin mold wasn’t quite as deep as the molds the bakers in the tent were using, and the self-rising flour was doing its thing. I couldn’t very well fix that cake while it was in the oven, so all I could do was watch it bake and worry.

BDB Martha Worry

I ended up taking out the cake at about 43 minutes, after checking for doneness with a wooden skewer. The bottom may have taken on a bit more color than it would have otherwise, but when I leaned into the take a sniff, Sue’s “very sexy sauna” style, I smelled some sweet, lemony goodness.

BDB cherry cake bottom
I’m baffled by my jaunty angle on this pic as well.

Flipping out. After letting the cake hang out on the counter for 10 minutes, and checking that the warm cake had pulled away from the side of the tin, I flipped my cake out. I could see a few of the cherries had sunk, and were revealing themselves like little embedded rubies, but I could also see some cherries peaking through the side of my cake, so I hoped that my cherries were well-distributed. I threw the cake in the fridge and got on with my toppings.

BDB Cherry Cake Flip
Jewels of cherry goodness or pox of sunken doom?

Ice, Ice, Baby! While my cake was in the fridge, I toasted my nuts, keeping my eye on them (Unlike Kate, who had to bin a pan of blackened nuts). I then got on making my icing. I’ve had some experience making a thick icing using citrus and icing sugar, and I’ve made the gamut from thin and runny to thick and gloopy. I’ve found the trick is to adding the liquid slowly and whisking so that the icing makes a thick ball of icing sugar that clings to the whisk. Continue whisking and adding liquid a half tablespoon at a time until there is enough liquid that the icing just lets go of the whisk. I don’t dare add another drop of juice after that. I find that that makes an icing that is pipe-able and not so thin that it gets lost in your cake.

When I had about ten minutes left, I took my cake out of the fridge. It was still barely warm, but I figured with the thickness of my icing, it was cool enough to decorate. Besides, I was racing the clock. I paused for but a moment, asking myself to pipe or not to pipe? Nancy piped her icing in a perfect zig-zag over her cake, which impressed the judges. Mary complimented that her impeccable ice-job “proves that she can do things with precision.” My piping skills would probably prove that I don’t practice my piping enough but I thought that if I cut my piping bag an inch or so in like Chetna did, I could control my icing more than if I spooned it on the cake like Mary did in the masterclass. Ultimately, I went with the spoon. 175 g of icing sugar didn’t look like a lot of icing to me, and I didn’t want to loose any of that white, tarty goodness in the piping bag.

Am I pleased with my icing job? Eh, no, but it was time to place the cherries. Some of the bakers halved their cherries while others left them whole a top their cake. Jordan, who failed to read the instructions and did not reserve the 5 cherries for the top of the cake, was out of luck.In the masterclass, Mary had Paul cut the five remaining cherries into eighths, much to his chagrin, and then place those on the cake. I decided to stay true to her method and stick the shiny, red crescents onto my cake. I then, Martha style, picked the most perfectly toasted and shaped almonds to adorn my cake.

BDB Cherry Cake Iced

Did I make time?? Um, technically no, but if I had Mel and Sue breathing down my neck giving my 5 minute warnings, I totally would have. My 2 hour 11 minute timer went off while I was placing my almonds.

The Gingham Altar

I, of course, don’t have Mary Berry and Paul Hollywood scrutinizing my bakes, but I presented Mary Berry Cherry Cake to my parents’ for dessert after Easter Dinner. Dinner was delicious, but all I could think was “are my cherries suspended, or aren’t they?”

BDB Easter Dinner
My cake in a place of honor next to the other carbs! Bonus points if you can spot where Brad nicked an almond, the bastard.

Does it make the cut? The moment of truth! Time to slice the cake! How do you like them cherries? Little red gems perfectly suspended in yellow cake. Relief! Admittedly, not all of the slices were as perfect as that one. Perhaps in the scooping and leveling phase, I could have been more cognizant that I had even cherries in each scoop, but every slice had cherries, so I’m going to call that a success.

BDB Cherry Cake The Cut

The actual cake was lemony and yummy. The icing is super tart, which is to my liking. The bake maaaaaay have been a bit dry, though I couldn’t get my parents and husband to admit it, but I think my simple little cherry cake would not have put me on the chopping block that week. I think I’d be somewhere in the middle with Kate around number 6. She also had a fine distribution of cherries but was also had a cake that was a bit dry. She did a neater icing job than me, but her almonds were a bit caught, so I could be somewhere between Kate and Diana.

I would have been nowhere near Nancy with her “perfect nuts” (“Wow! To be commended on your nuts by Mary Berry!” Gotta love Sue!) , I’m pretty pleased with my theoretical standing in my first technical bake. I was relieved at the finish. Like Luis, I wanted to exclaim “Come on, Diana! High five me!”

The Recipe: Mary Berry’s Cherry Cake

Tools

Food Scale

23 cm Ring Mold (9.75” Savarin Mold)

Cake Ingredients

200 g of Glace Cherries (Plus 5 for decorating)

225 g of Self-Rising Flour

175 g of Softened Butter

175 g of Caster Sugar

50 g of Ground Almonds

Zest of a Lemon

3 whole large eggs

Icing Ingredients

175 g of icing sugar

Juice of 1 Lemon, strained

Flaked/Sliced Almonds

  1. Prep your oven and pan. Pre-heat your oven to 160 C fan (320 F fan, 345 degrees F in a conventional oven) and grease your tin with butter.
  2. Prepare the Cherries. Quarter, rinse, and dry the cherries with a kitchen towel. Borrow a tablespoon of flour to coat the cherries.
  3. All-In-One Method. Add softened butter, caster sugar, ground almonds, lemon zest, 3 large whole eggs. Combine ingredients until well combined into a stiff mixture.
  4. Cherry time! Fold in cherries.
  5. Put in tin. Scoop in mixture and level.
  6. Bake! For about 35 (46 in conventional oven) minutes until it is well risen and a pale golden brown.
  7. Cool, flip out, and cool. Let the cake cool in the tin for 10 minutes until the cake is shrinking from the sides, turn out the cake, and then let it cool completely.
  8. Make icing. Slowly whisk juice into the icing sugar a little at a time until it is still thick but will drip down the side of the cake.
  9. Toast almonds. On the stove in a dry pan on medium heat, stirring constantly until they are slightly brown and fragrant.
  10. Decorate! Once the cake is entirely cooled, cut the remaining cherries into 8ths. Ice the cake thickly, encouraging it to drizzle down the side. Sprinkle on toasted almonds and cherry eighths.